Photo Culling Software for Mac: A Local Folder-to-Export Workflow
A good culling workflow should reduce searching without taking control away from the photographer. This guide follows one shoot from a local folder to a clean set of selected originals.
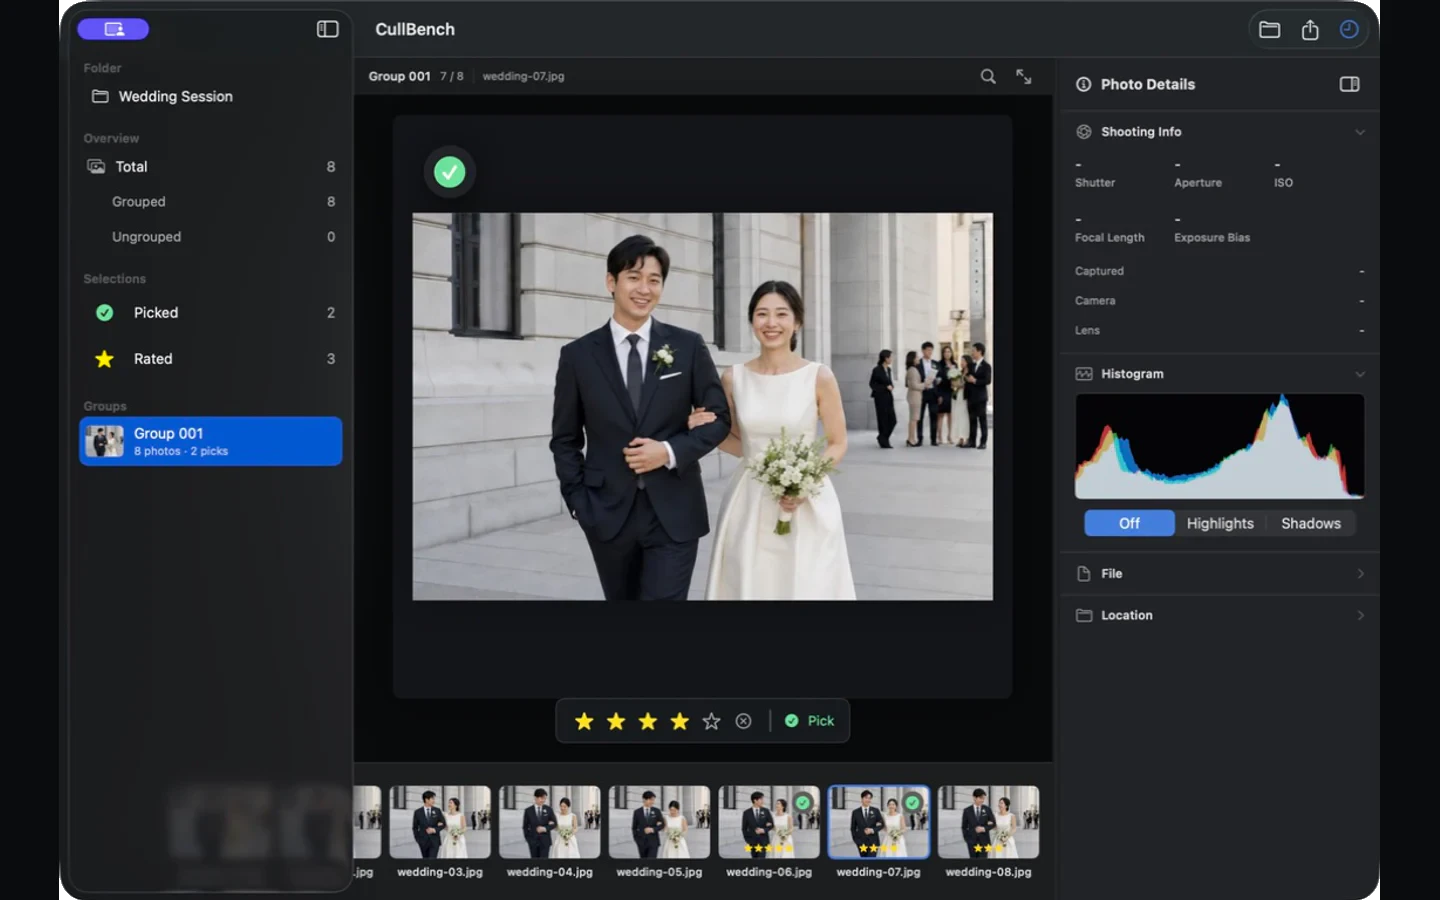
- Best for
- Weddings, events, portraits, travel, and burst-heavy shoots
- Source
- A folder already on your Mac or external storage
- Result
- Copied selected originals or AirDrop
- Requirements
- Apple Silicon · macOS 14 or later
What photo culling software should remove from the workflow
Culling is the decision stage before editing. The job is not to develop RAW files or organize a permanent library. It is to move through a shoot, compare nearby alternatives, mark the frames worth carrying forward, and preserve a reliable path back to the originals.
The slow part is often not judging a photograph. It is finding the other frames from the same moment. A useful culling workspace keeps related images close, makes the current decision visible, and lets the photographer continue from the keyboard.
- No catalog import before the first review.
- No automatic deletion or hidden AI rejection.
- No need to move or rename the source folder.
- A clear second pass over Picked and Rated photographs.
The folder-to-export workflow
Use a copy of the shoot or a folder whose backup is already secure. CullBench reads the folder in place. Analysis data can live in managed app storage or beside the source as portable session data, while original photographs remain untouched.
- 01
Open the shoot
Choose a local folder or drag it into the main preview. CullBench begins scanning supported still images and prepares previews for browsing.
- 02
Review similar moments
Start with the first similar group. Use the arrow keys to move through photographs and across group boundaries. Press Space to Pick or unpick the current frame.
- 03
Keep the first pass broad
Pick every frame that deserves another look. Add a star rating only when it communicates a useful distinction, such as delivery priority or portfolio potential.
- 04
Make the second pass
Open the Picked or Rated collection from the sidebar. Removing a Pick or rating keeps the photo visible briefly before the filtered collection updates, so the result does not feel like it vanished under the cursor.
- 05
Export original files
Copy the selected originals to a destination folder or send them with AirDrop. Existing filenames are preserved, and duplicate names are skipped instead of creating a second copy.
Use different questions for the first and second pass
The first pass asks whether a photograph is viable. The second pass asks whether it still earns a place when compared with every other viable frame. Trying to answer both questions at once usually creates slower, more inconsistent decisions.
Within a similar group, compare expression, gesture, focus, obstruction, and composition. Across the Picked collection, compare storytelling role and duplication. A technically strong frame can still be unnecessary when another photograph communicates the same moment more clearly.
- First pass: keep plausible choices moving forward.
- Second pass: remove redundant choices and settle delivery priority.
- Ratings: reserve them for distinctions you will use later.
- Ungrouped: review it as a normal collection, not as discarded material.
Know what is analyzed and what is exported
CullBench directly supports common still-image formats including JPEG, PNG, TIFF, WebP, BMP, and static HEIC/HEIF. RAW support depends on the decoder available in macOS. Supported RAW files use a local derivative for visual analysis, while export copies the original RAW file.
Video and Live Photo companion MOV files are outside the current workflow. CullBench is also not a RAW editor and does not yet write XMP sidecars for Lightroom or Capture One. Use the exported originals as the handoff to your editing application.
Keep the shoot local
Photo analysis, grouping, previews, ratings, Picks, and export run on the Mac. CullBench does not upload photos for culling and does not require a CullBench account.
Optional crash diagnostics and anonymous usage analytics are off by default. If enabled, they exclude photos, previews, filenames, paths, EXIF, ratings, Picks, and analysis vectors. Each option can be changed independently in Settings.
Current limits to plan around
CullBench currently requires an Apple Silicon Mac running macOS 14 or later. The app includes its local analysis runtime, so the Mac App Store download is larger than a conventional image browser.
Visual grouping is an organizing aid, not a verdict. Some related frames can remain ungrouped, and visually similar but contextually different photographs can occasionally appear together. The photographer remains responsible for the final selection and original-file backup.